

How To Draw A Protogen
Hey! Thanks for tuning in! This is c0nn0r's classroom, where I will do
tutorials to help you draw protogens!
**clap now**
Today's tutorial is..
Headshots! Hopefully these handy tips will help you out if you struggle with protogen heads! Next time I'll do a fullbody tutorial!
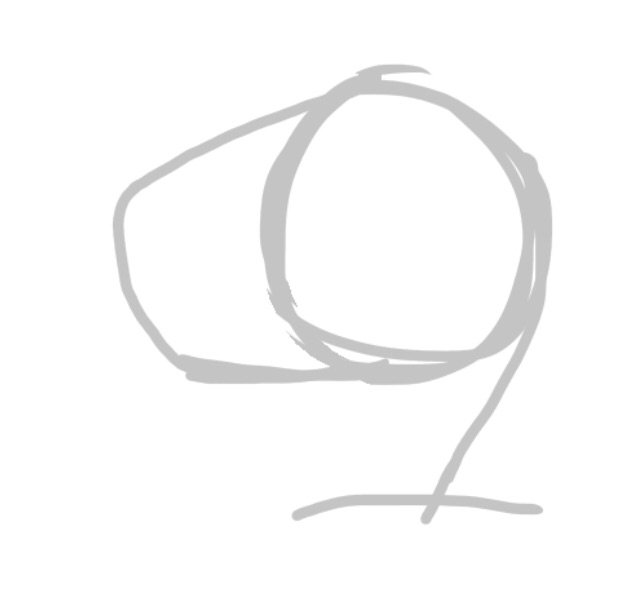
:star: 1) basic sketch :star:
When drawing a proto I usually start with a circle, which will be the foundation for the head. And a line indicating the neck. And occasionally a shoulder line

But right now it's very empty..
:star: 2) visor :star:
I draw the visor next, I usually draw the upper curve first followed by the bottom curve. Then I join them up. But this can make it look sharp so you want to round off the edges

Smooth :ok_hand:
If you find the visor is too long this won't matter too much, as you can move it more into the head to shorten it if needed
:star: 3) Panels! :star:
But now, alas the easy part is over. I usually use a rough oval shape for the side panel but it can vary. I don't have too much advice for this part. But I do add a little bump over the top to show that it has depth

And you want to try and keep it the same width all the way over or the proportions can look off
:star: 4) drawing fur :star:
Right this will be tough to explain, the floof on the top of the head first. First of all it has to go in the right direction. Over the head towards the back. Now depending what you use for your art (mouse, stylus, finger, drawing tablet, paper) this can be hard. You want to make the fur quite random and stick out in some random places. And it has to go quite far down the head to show the separation from the ear

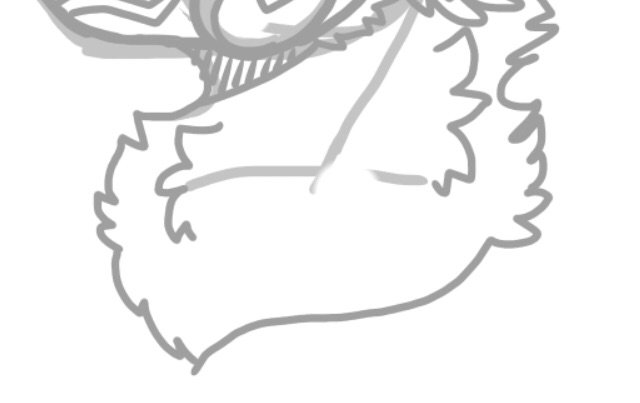
:star: 5) fluffy cheeks :star:
For the cheek floof I try and make it perk up slightly, to show the head shape a bit better. And then as it goes under the chin it shortens out a bit more

:star: 6) now onto the ears :star:
First of all, I always start with the top of the ear. As that defines the shape. (Some lil examples) the ear can vary depending on the protogen. And for secondary ears I basically repeat it on a smaller scale. The ear curves round and is quite smooth up until around half way on the bottom, I haven't added the inner fluff yet which I will talk about next.

The way I draw ears makes it that they have a lot of fluff, but styles can vary. First of all the bottom of the ear. My style has the fur very bunched up and sticking outwards with the same random pattern as before. Also the top of the ear, if you imagine folds over, so I continue the line and bring it down into a nice curve. With the same bunch of fur as the bottom of the ear. The inside usually has a few bigger bunches (again this can vary with styles)

:star: 7) chest fluff :star:
Finally the chest fluff, you want your proto to have a neck that makes physical sense, right? So I start with a curve from under the chin I bring it out forwards and a few little spikes at the front. I then usually curve it down and use the same random fur pattern as before. For the back of the neck I usually start it around where the ear fluff is then make it spike outwards before curving it round and out again. For a headshot you can round off the gap and add a few sticking out fluff clumps if you wish, then ad a small few fur spikes sticking outwards at the front and maybe at the side. After this add you panel details and visor details and you are good to do the lineart. If you follow your sketch you should be fine!
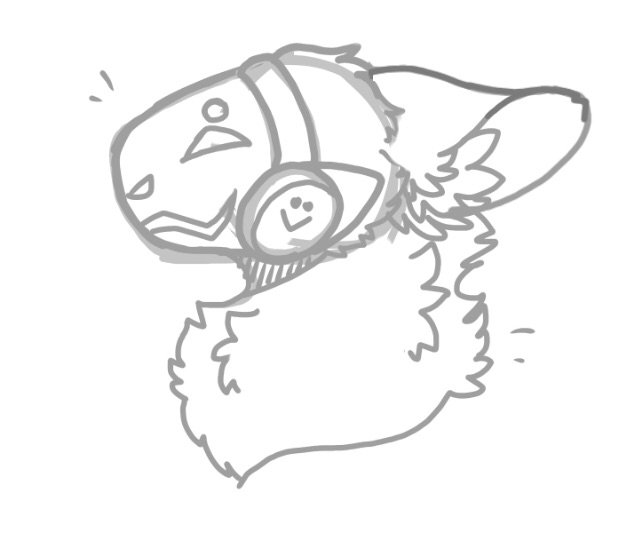
Finished sketch:
How To Draw A Protogen
Source: https://aminoapps.com/c/primaprotoofficial/page/blog/c0nn0rs-classroom-headshot-tutorial/KQWV_PbtMuR7pGMBYBg1mxnWzV35GBzZaJ
Posted by: swainfrivinse64.blogspot.com
0 Response to "How To Draw A Protogen"
Post a Comment